
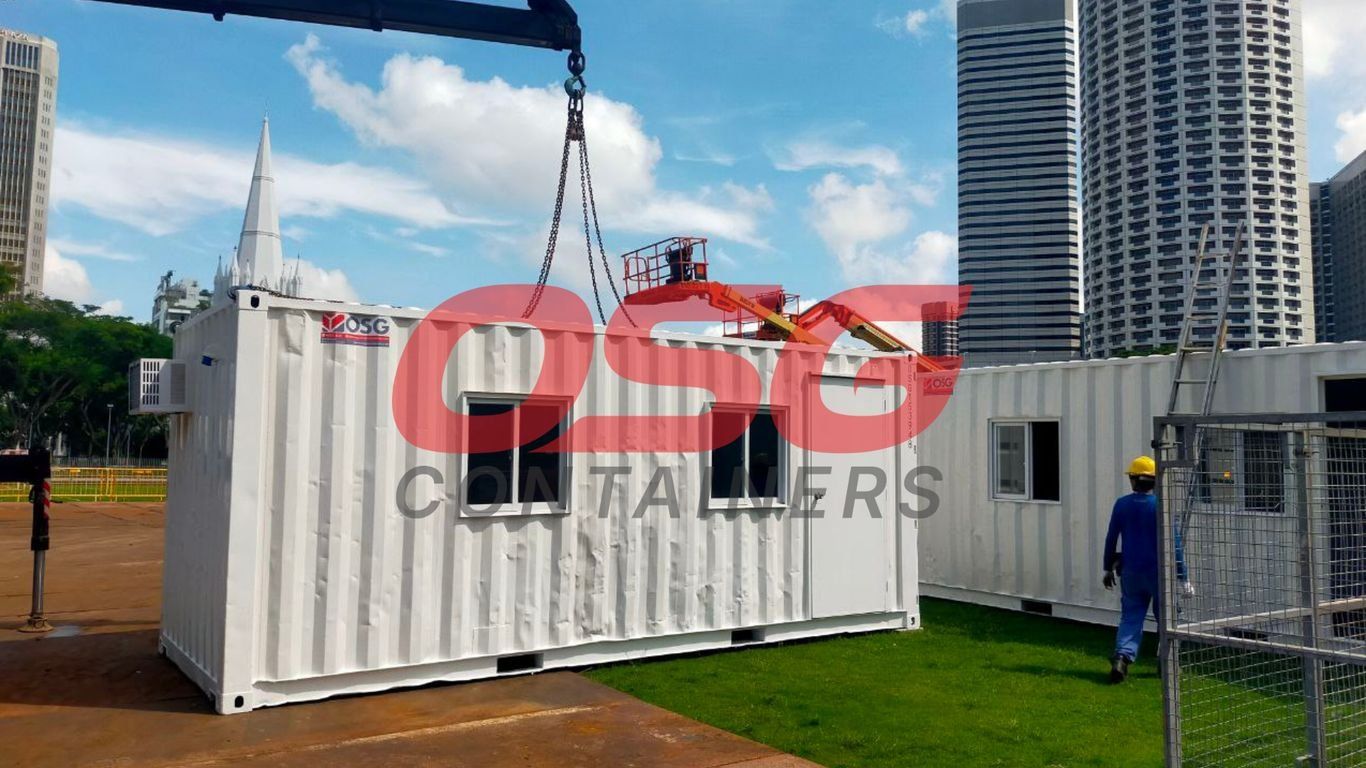
Buying a shipping container, especially a 20ft container, might seem straightforward, but it’s easy to stumble into common problems. People often overlook details that can lead to extra costs or a container that just doesn’t work for their needs. To help you avoid those headaches, we’ve put together some key things to keep in mind.
Key Takeaways
- Make sure you know the exact dimensions you need, comparing standard and high cube 20ft container options to fit your storage or project space.
- Always check the condition of a 20ft container closely. Look for rust, dents, and other damage, and understand what industry grades mean.
- Plan your delivery route and site carefully. A 20ft container needs clear access for the truck and a stable, level spot to sit.
- Before you buy, research local rules. Some areas have specific laws about where and how you can place a 20ft container.
- Don’t just go for the cheapest 20ft container. Think about how long it will last, its condition, and if the seller offers good support.
Selecting The Right Container 20ft Size
Choosing the right 20ft container is more than just picking a box; it’s about making sure it fits your needs perfectly. A standard 20 ft container is a workhorse for a reason. It offers a good balance of space and manageability, making it super popular for everything from storing household goods during a move to keeping equipment on a construction site. But not all 20ft containers are created equal, and you need to think about a few things before you hand over your cash.
Understanding Standard vs. High Cube Dimensions
When you’re looking at 20ft containers, you’ll mostly see two types: standard and High Cube. The main difference is height. A standard 20ft container is about 8.5 feet tall. Now, a High Cube 20ft container gives you an extra foot, making it 9.5 feet tall. That extra height might not sound like much, but it can make a big difference, especially if you plan on insulating the inside or stacking items high. It means you can add insulation without losing too much headroom, which is great for creating a more comfortable workspace or keeping things cooler.
Assessing Storage Needs for Your Container 20ft
So, what are you actually going to put in this 20 ft container? Think about the volume of your stuff. A 20ft container has roughly 1,170 cubic feet of space. That’s enough to hold the contents of a small house, but if you’re storing bulky machinery or large inventory, you need to be realistic about how much will fit. Measure your biggest items. It’s better to have a little extra space than to find out your forklift won’t quite fit.
Considering Project-Specific Space Requirements
Your project’s specific needs are key. Are you using the 20ft container as a temporary office, a workshop, or just for storage? If it’s a workshop, you’ll need space to move around. If it’s for storing tools, maybe you need to think about shelving. For something like a pop-up shop, you’ll need room for displays and customers. Don’t forget about how you’ll access the items inside. Will you need to open the doors wide often? Thinking through these details now saves a lot of headaches later.
Picking the right size and type of 20ft container upfront means you won’t be stuck with something that’s too small or awkwardly shaped for your intended use. It’s all about matching the container to the job.
Evaluating Container 20ft Condition
Recognizing Signs of Wear and Tear
When you’re looking at used 20ft shipping containers, it’s easy to get caught up in the idea of saving money. But you really need to look closely at what you’re getting. These containers have traveled the world, so some wear is expected. The trick is knowing what’s normal and what’s a red flag.
Look for dents, especially on the corners and along the sides. Small dings are usually fine, but deep gouges or areas that look like they’ve been patched up a lot might mean structural issues. Surface rust is also common, particularly around seams and door hinges. A little bit of surface rust can often be cleaned up and treated, but if you see rust that’s eating through the metal or large, flaky patches, that’s a problem. Check the floor too; it should be solid, usually made of thick plywood. Make sure there aren’t any soft spots, rot, or major damage.
Understanding Industry Condition Grades
Sellers usually grade their containers so you know what you’re buying. It’s not just a random label; these grades tell you a lot about the container’s history and its suitability for different uses. Knowing these grades helps you avoid paying for more than you need or getting a container that won’t work for your project.
Here’s a quick rundown of common grades:
- Cargo-Worthy (CW): This means the container is structurally sound and has passed inspection for shipping. It’s good for moving goods, but expect to see signs of use like dents and surface rust.
- Wind and Watertight (WWT): These containers are guaranteed to be dry inside and free from leaks. They’re great for storage on your property but aren’t certified for transport.
- As-Is: This is the cheapest option. The container might have significant damage, rust, or leaks. It’s usually best for projects where the container will be heavily modified or even scrapped.
Always ask for clarification if you’re unsure about a grade. A reputable seller will be happy to explain what each term means and how it applies to the specific container you’re considering.
The Importance of Detailed Visual Inspections
Even if a container is graded as WWT or CW, you should still do your homework. Don’t just rely on a seller’s description or a few photos. If possible, go see the container yourself. If you can’t, ask for lots of clear, recent pictures of the exact unit you’re thinking of buying.
Pay attention to:
- Doors: Open and close them. Do they seal properly? Are the hinges and locking bars in good shape?
- Roof: Look for any sagging, holes, or major repairs. Water pooling can indicate problems.
- Floor: Check for damage, especially in the corners. Is the plywood intact?
- Walls: Look for excessive patching or signs of major structural repair.
Remember, these shipping containers are built tough, but they aren’t invincible. A thorough inspection can save you a lot of headaches down the road, whether you’re using it for simple storage or a more complex project.
Navigating Delivery And Site Preparation
Getting your 20ft container to your site and set up right is a big deal. It’s not just about dropping it off; it’s about making sure it gets there safely and sits where it needs to without causing problems. Think of it like parking a big truck – you need enough room to maneuver.
Ensuring Adequate Site Access for Delivery Trucks
Delivery trucks, especially the ones carrying containers, are large. They need a clear path to get to where you want the container placed. This means checking for:
- Overhead Obstructions: Low-hanging branches, power lines, or even awnings can be a problem. Make sure the truck can pass without hitting anything.
- Turning Radius: Trucks need space to turn. A tight corner or a narrow street can make delivery impossible. Measure the path the truck will take, not just the final spot.
- Ground Conditions: Is the path to your site paved, or is it dirt and mud? A heavy truck can get stuck, especially after rain. You might need to lay down temporary mats or gravel.
Preparing A Stable Foundation For Your Container 20ft
Once the truck gets there, the container needs a solid place to rest. Just putting it directly on soft ground isn’t a good idea. It can sink over time, especially with heavy contents inside, and that can warp the container or make the doors hard to open.
- Level Surface: The ground needs to be as level as possible. You can use gravel, concrete pads, or even sturdy wooden blocks to create a stable base.
- Weight Distribution: A 20ft container, even when empty, is heavy. Spreading that weight out is key. Using concrete blocks or steel plates under the corners helps prevent sinking.
- Elevation: Sometimes, it’s good to have the container slightly off the ground. This helps with airflow underneath and stops water from pooling, which can lead to rust.
Planning For Ground Stability And Drainage
Think about what happens when it rains. Water needs to go somewhere. If your container is sitting in a low spot or on ground that doesn’t drain well, you’ll end up with puddles around and under it. This is bad for the container’s metal and can make the ground around it muddy and unstable.
Proper site preparation isn’t just about making delivery easy; it’s about protecting your investment and ensuring the container remains functional and safe for its intended use. Ignoring these steps can lead to unexpected costs and delays down the line.
Consider grading the area so water naturally flows away from the container. If you’re placing it on a slope, you’ll need to take extra steps to make sure it’s secured and won’t shift. Using materials like crushed stone or gravel can help improve drainage around the base.
Addressing Legal And Regulatory Compliance
So, you’ve got your 20ft container, and you’re ready to get it set up. But hold on a second, before you go placing it anywhere, we need to talk about the paperwork and the rules. It’s not the most exciting part, I know, but skipping this step can lead to some serious headaches, like having to move your whole setup or facing fines. Always check local rules before you even think about delivery.
Researching Local Zoning Ordinances
Every town, city, and county has its own set of rules about what you can and can’t do with property. This is where zoning ordinances come in. They dictate things like where you can place structures, how big they can be, and sometimes even what they can be used for. For a 20ft container, you’ll want to find out if there are specific restrictions on accessory structures or temporary buildings. Some areas might have rules about how long a container can stay on a property, especially if it’s not a permanent structure. It’s a good idea to get this information directly from your local planning or zoning department. They’re the ones who know the specifics for your area.
Understanding Permit Requirements For Placement
Beyond general zoning, you might need a permit to actually place your container. Think of it like getting permission from the city or county. The requirements for permits can vary a lot. Sometimes, it depends on the size of the container, how long you plan to keep it, or what you’ll be using it for. For instance, using it for storage might have different rules than using it as a temporary office. You might need to submit plans, show where it will go on your property, and possibly pay a fee. It’s better to ask about permits early on, rather than finding out you needed one after the container is already delivered.
Securing Necessary Approvals Before Installation
This is the final step before you can relax. Once you know the zoning rules and what permits you need, you have to go through the process of actually getting them. This might involve filling out applications, providing documentation, and waiting for approval. It can take time, so don’t wait until the last minute. Some places might require you to have a site plan showing the container’s exact location, or even proof of foundation plans if it’s going to be a more permanent fixture. Getting all your approvals in writing is a smart move. It protects you if any questions come up later.
Ignoring local regulations can turn a simple container project into a costly legal battle. It’s always best to be proactive and understand the rules of your specific location before you commit to buying or placing a container.
Prioritizing Value Over Initial Cost
When you’re looking at 20ft containers, it’s easy to get fixated on the sticker price. You see a cheap one, and your wallet starts to feel happy. But hold on a second. That super low price might be hiding some serious headaches down the road. It’s way smarter to think about the total picture, not just what you pay today.
Comparing Total Cost of Ownership
Think about it like buying a used car. The cheapest one might need a new engine next month. With containers, the same idea applies. A container that looks okay but has hidden rust or a leaky roof will cost you more in repairs, lost inventory, or even replacement down the line. You also have to factor in delivery fees, which can change a lot depending on where the container is coming from. Sometimes, paying a bit more for a container that’s closer to your site saves you a bundle on trucking.
Here’s a quick breakdown of what to consider:
- Initial Purchase Price: What you pay for the container itself.
- Delivery Fees: How much it costs to get it to your location.
- Repair Costs: Any work needed to make it usable or keep it that way.
- Maintenance: Ongoing upkeep to prevent issues.
- Potential Losses: What you might lose if the container fails (e.g., damaged goods).
Assessing Durability and Longevity
Containers are built tough, usually from Corten steel, which is meant to handle rough weather. But not all containers are created equal, especially the used ones. Some might have been used for tough cargo or spent years in harsh environments. You want a container that’s going to last. A container that’s rated as ‘Wind and Watertight’ (WWT) is generally a good bet for on-site storage. It means it’s solid enough to keep things dry and secure, even if it’s not pretty enough for shipping anymore. Cargo-Worthy (CW) containers are even better, but you might not need that level of certification if it’s just sitting on your property.
Don’t just look at the dents and paint. Ask about the container’s history, check the floor for rot, and inspect the door seals. A little bit of surface rust is usually fine, but major corrosion or patched-up holes are red flags.
Evaluating Supplier Reputation and Support
Who you buy from matters a lot. A supplier with a good reputation usually means they stand behind their products. They’ll be upfront about the condition of their containers and won’t try to sell you something that’s falling apart. Look for companies that offer inspections or provide detailed photos. Some suppliers even offer support if you run into issues later on. It’s worth spending a little extra time researching potential suppliers and reading reviews. A company that understands your needs and offers reliable service can save you a lot of hassle and unexpected expenses in the long run.
Implementing Security Measures For Storage
Alright, so you’ve got your 20ft container, and now you need to make sure whatever you put inside stays put. This isn’t just about keeping the rain out; it’s about keeping your stuff safe from, well, people who shouldn’t be getting into it. Think of it like locking your house, but on a bigger, steelier scale.
Choosing Robust Locking Mechanisms
This is your first line of defense. Don’t just rely on the standard padlock that comes with it, or worse, nothing at all. You need something solid. A good heavy-duty padlock is a start, but you can get more serious. Look for container-specific locks that are designed to be tamper-proof and fit snugly over the locking bars. Some even have reinforced steel casings to make them harder to cut or break. It’s also worth considering a lock that uses a unique key system, so it’s not something a common thief can just pick up a copy for.
- Heavy-duty padlocks: Look for hardened steel shackles and a boron alloy construction. These are tougher to cut.
- Container-specific locks: These often bolt directly onto the container’s door frame, making them much harder to pry open.
- Keyed-alike systems: If you have multiple containers or need access for different people, getting locks that all open with the same key can simplify things.
Planning For Additional Security Enhancements
Beyond just the lock, what else can you do? Think about making the container itself less of an easy target. If it’s sitting out in the open, it’s a beacon for trouble. Maybe you can position it where it’s not easily visible from the road, or perhaps near a security camera if you have one. Some people even add extra steel plating or bars to the doors, though that’s usually for very high-value storage.
- Strategic Placement: Position the container in a well-lit area or out of plain sight if possible.
- Alarm Systems: Battery-powered motion sensors or door alarms can alert you if someone tries to get in.
- Surveillance: If feasible, position the container within view of existing security cameras.
Protecting Valuables Within Your Container 20ft
So, you’ve got the locks and maybe some extra security. Now, what about inside? If you’re storing really valuable stuff, just tossing it in might not be enough. Think about how things are arranged. Don’t just pile everything up near the door where it’s easy to grab. Maybe use shelving to keep things organized and off the floor. If you’re storing sensitive items, consider if they need extra protection, like being in their own locked box or container within the main one. It’s like a Russian nesting doll of security.
The goal is to make accessing your stored items as difficult and time-consuming as possible for anyone who shouldn’t be there. Layering different security measures, from the physical lock to the placement of the container itself, creates a much stronger deterrent than any single method alone.
Here’s a quick rundown of what to think about:
| Security Layer | Example Measures |
|---|---|
| Physical Locks | Heavy-duty padlock, container-specific lock |
| Container Security | Strategic placement, lighting, extra plating |
| Internal Security | Shelving, secondary locked containers, alarms |
| Deterrence | Warning signs, visible cameras, good lighting |
Planning For Long-Term Container Maintenance
So, you’ve got your 20ft container all set up. That’s great! But don’t just forget about it. These things, like anything else, need a little TLC to keep them in good shape for the long haul. Ignoring maintenance is a surefire way to end up with problems down the road, and trust me, nobody wants that.
Preventing Rust and Corrosion
Rust is the enemy of steel, and shipping containers are made of steel. Exposure to moisture, salt, and even just humid air can start the corrosion process. The best defense is a good offense, so keeping the exterior clean and dry is key.
- Regular Washing: Give your container a good wash every so often, especially if it’s near the coast or in a wet climate. This removes salt, dirt, and other gunk that can trap moisture.
- Touch-Up Paint: If you notice any chips or scratches in the paint, get them fixed pronto. A little bit of rust-inhibiting primer and matching paint can stop a small problem from becoming a big one.
- Undercoating: Consider applying a protective undercoating, especially to the bottom of the container. This area is most vulnerable to road salt and standing water.
Ensuring Proper Ventilation
Condensation is another big issue, especially if you’re storing things inside. When warm, moist air inside the container meets the cooler steel walls, water droplets form. This can lead to mold, mildew, and damage to your stored items.
- Ventilation Ports: Make sure your container has adequate vents. If it doesn’t, consider having some installed. These allow air to circulate, reducing moisture buildup.
- Avoid Overpacking: Don’t cram your container so full that air can’t move around. Leave some space between items.
- Dehumidifiers: For sensitive items or in very humid areas, a small dehumidifier might be a worthwhile investment.
Scheduling Regular Inspections and Upkeep
Think of this like a check-up for your container. Catching small issues early can save you a lot of hassle and money.
- Monthly Walk-Arounds: Just take a quick look around the outside and inside. Check for any new rust spots, dents, or damage to the doors and seals.
- Annual Deep Dive: Once a year, do a more thorough inspection. Check the floor, the roof, and all the seals. Make sure the doors operate smoothly.
- Address Issues Promptly: If you find anything, don’t put off fixing it. A small leak or a loose bolt can quickly turn into a major repair if ignored.
Keeping your container in good shape isn’t just about appearances; it’s about protecting what’s inside and making sure the container itself lasts as long as possible. A little bit of regular attention goes a long way in preventing costly repairs and keeping your storage solution reliable.
Wrapping It Up
So, buying a 20ft container might seem straightforward, but as we’ve seen, there are definitely a few common traps people fall into. It really comes down to doing your homework. Always double-check the size you actually need, and don’t just take a seller’s word for it – get eyes on the container’s condition if you can, or at least demand clear photos and details. Delivery logistics and local rules are also big ones to get right from the start. And remember, the cheapest option isn’t always the best value in the long run. By keeping these points in mind and working with a supplier you can trust, you’ll be well on your way to a successful container project without all the unnecessary headaches.
Frequently Asked Questions
What’s the difference between a standard 20ft container and a High Cube one?
A standard 20ft container is about 8.5 feet tall. A High Cube is a foot taller, making it 9.5 feet tall. That extra foot is really handy if you want to add insulation to the roof without losing headroom, or if you just need a bit more space to move around.
How do I know if a used container is in good shape?
Look for clear signs of rust, big dents, or holes. Reputable sellers will tell you the container’s condition, like ‘Wind and Water Tight’ (meaning it won’t leak) or ‘Cargo Worthy’ (meaning it’s strong enough for shipping). Always ask for recent, clear pictures of the actual container you might buy.
Why is site preparation so important before a container is delivered?
Containers are super heavy! If the ground isn’t level and firm, the container could sink, shift, or even tip over. This is a big safety risk. You need a stable, flat spot, usually made of packed gravel, concrete, or sturdy mats, so the truck can deliver it safely and it stays put.
Do I need special permission to put a 20ft container on my property?
Often, yes. Your town or city might have rules about where you can place containers, how long they can stay, or if you need a permit. It’s best to check with your local government office before you buy or place the container to avoid fines or having to move it later.
Is it okay to buy the cheapest container I can find?
Not always. The cheapest option might be cheap because it’s in bad shape, has hidden problems, or the seller isn’t reliable. Think about the total cost – including delivery, any repairs needed, and how long it will last. A slightly more expensive container in good condition from a trusted seller is usually a better deal in the long run.
How can I keep my stuff safe inside the container?
Make sure the container has strong, secure locks. You might also want to add extra security, like a padlock with a hardened steel shackle or even a security system if you’re storing very valuable items. Thinking about where you place the container on your property can also help deter theft.