Project Duration Settles Your Choice of Site Offices
Site offices are prefabricated, relocatable workspaces built from repurposed shipping containers or steel modular frames to house project management teams. Selecting the right unit depends primarily on project duration and layout constraints: short jobs warrant standard rental cabins, while timelines over eighteen months require custom-engineered, fully insulated modular builds that reduce lifecycle maintenance costs.
Your project schedule dictates whether you should rent a standard cabin or build a customized steel workspace. Running a job for six months calls for simple, low-cost mobilization, but once a timeline stretches beyond eighteen months, poorly configured facilities bleed money through constant repairs, cramped teams, and high energy bills. Deciding how to set up your facility requires evaluating team headcounts, spatial limits, and off-site manufacturing standards before placing a single unit on the ground.
Stage 1: Determining Spatial Capacity and Site Layout
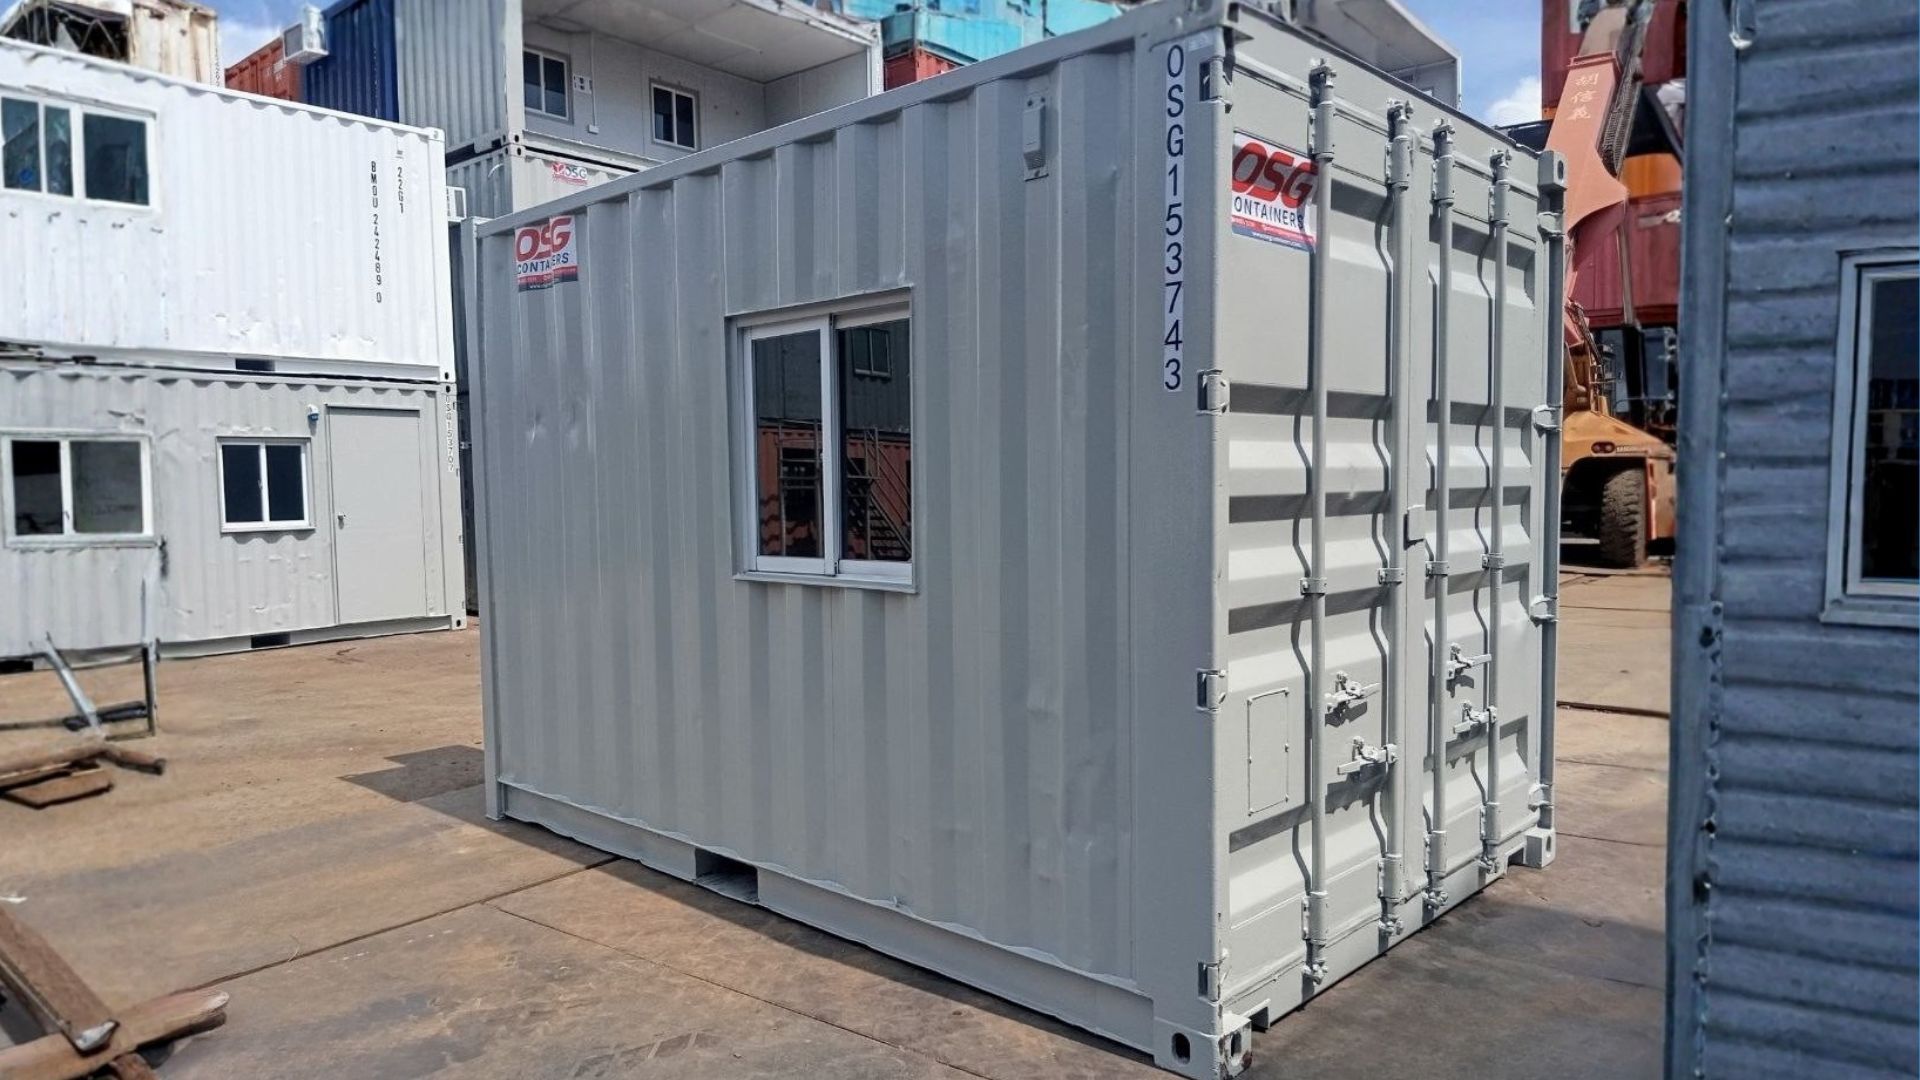
Selecting site offices begins with measuring real physical constraints rather than guessing desk numbers from an organizational chart. Standard ISO shipping containers follow rigid external dimensions under ISO 668:2020, typically arriving in twenty-foot or forty-foot lengths with an external width of eight feet. While these dimensions make transport straightforward, they leave you with roughly seven feet and four inches of internal width once interior wall framing and thermal insulation take up their share of the cavity.
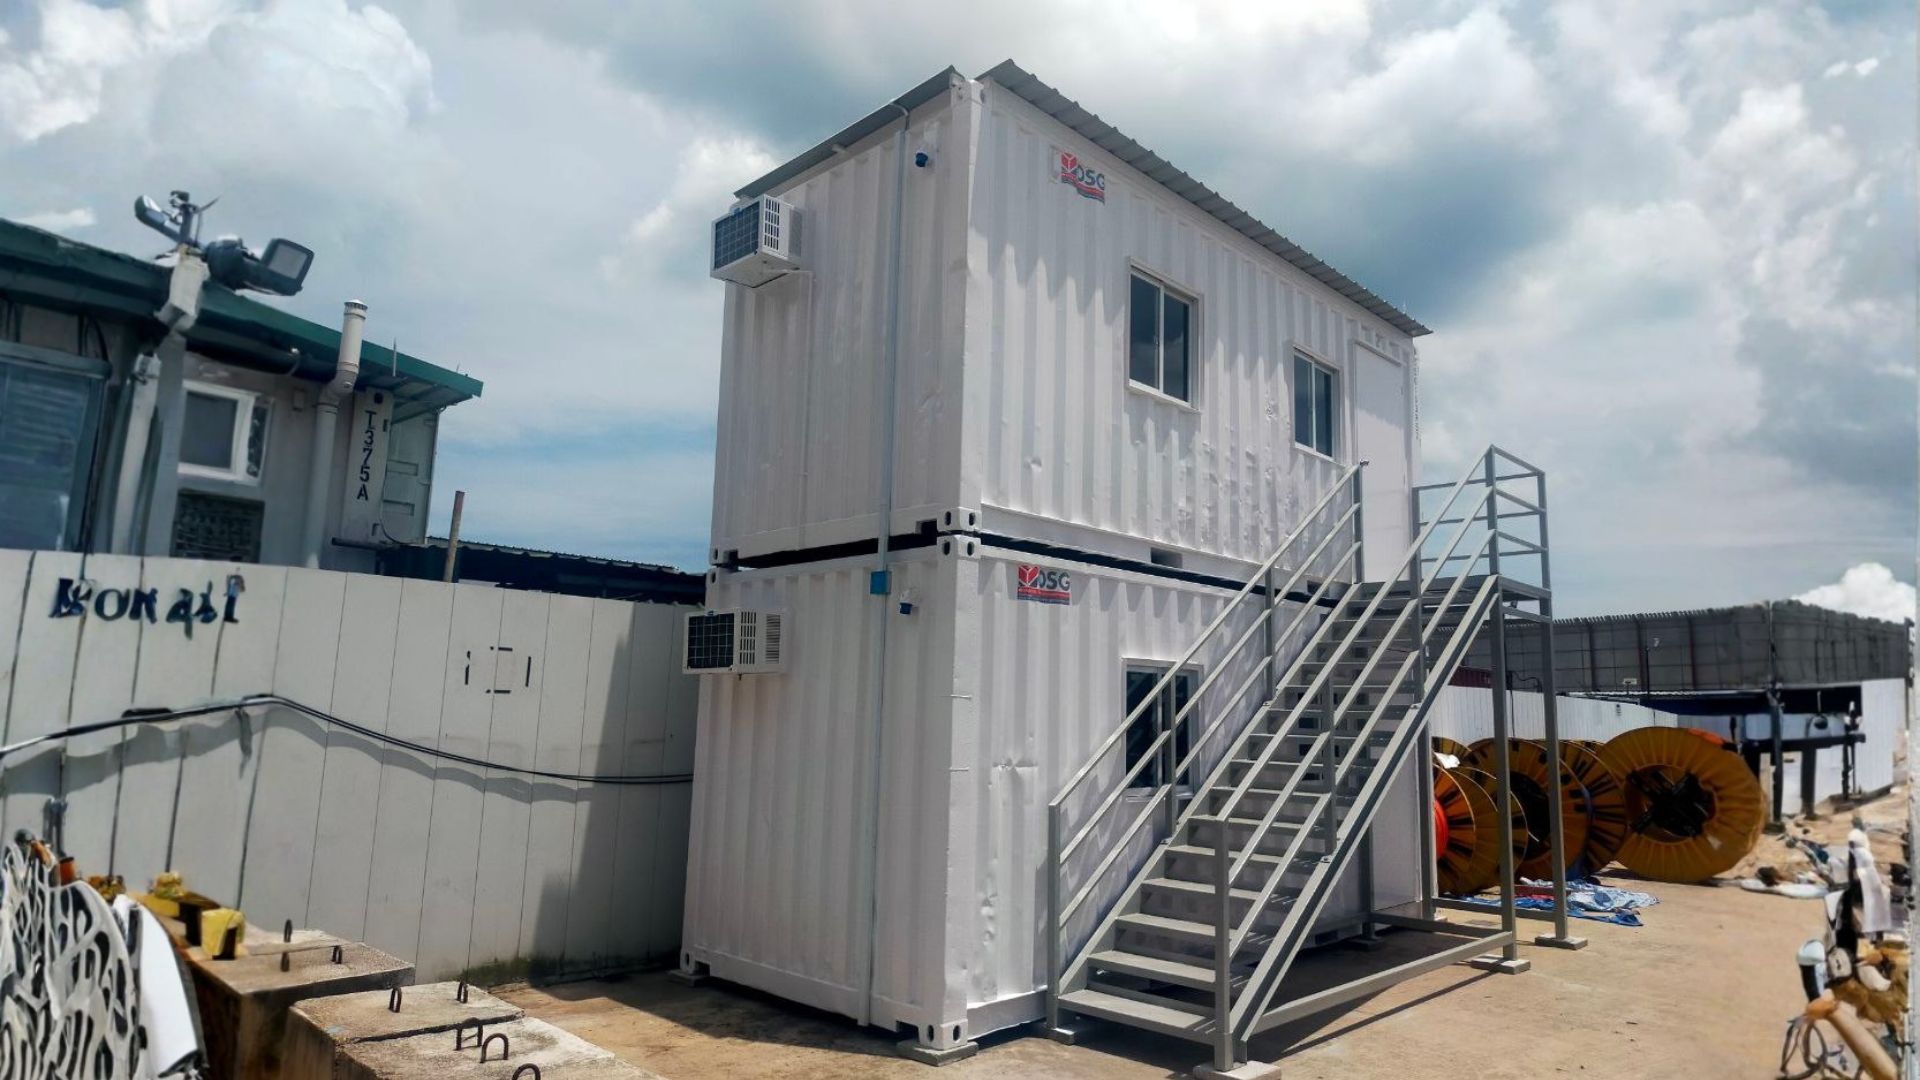
We see teams repeatedly underestimate the space required for circulation and technical equipment. If you place four workstations into a single twenty-foot shell, you leave almost no room for plan tables, safety induction screens, or personal protective equipment storage. Planning your compound requires balancing desk density against the physical clearances your site allows around property lines, tower cranes, and active heavy-haul transit paths.
| Container Size | Nominal Footprint | Usable Floor Area | Optimal Staff Capacity | Primary Site Application |
|---|---|---|---|---|
| 20-Foot Standard | 20 ft × 8 ft (160 sq ft) | Approx. 130 sq ft | 1 to 2 workstations | Gatehouses, safety checkpoints, foreman field cabins |
| 40-Foot Standard | 40 ft × 8 ft (320 sq ft) | Approx. 280 sq ft | 4 to 6 workstations | General administrative offices, dual-desk workspaces |
| 40-Foot High-Cube | 40 ft × 8 ft (320 sq ft) | Approx. 280 sq ft | 4 to 6 workstations | Multi-desk suites needing overhead ducted air and cable trays |
| Modular Double-Wide | 40 ft × 16 ft (640 sq ft) | Approx. 570 sq ft | 8 to 12 workstations | Joint venture boardrooms, tender coordination hubs |
Why Do Sizing Mismatches Disrupt Administrative and Field Teams?
Administrative staff and field supervisory teams operate on completely different rhythms, and crowding them together inside a single open space causes immediate friction and lost productivity. Project managers, safety officers, and commercial accountants need quiet, private zones to review subcontracts, study blueprints, and hold commercial calls without interruption. In contrast, general site supervisors, subcontractor leads, and crane coordinators constantly walk in and out of the door, dragging in dirt, mud, and continuous background radio noise.
When you force both functions into an open-plan shell, desk productivity drops and your administrative desks quickly become cluttered with site gear. We recommend dividing a forty-foot unit with a central partitioned acoustic wall, or separating your layout into two distinct units joined by a covered external breezeway. That split preserves quiet zones for administrative staff while giving operational personnel immediate access to field desks without disturbing ongoing meetings.
What Are the Warning Signs of Inadequate Ground Clearance?
A worksite footprint changes over its lifecycle, showing inadequate clearance when supply trucks cannot turn without grazing cabin walls, or when pedestrian exit corridors drop below ten feet. You need to review underground utilities, overhead power line setbacks, and crane swing radiuses before locking in your compound footprint. If a supply truck cannot turn around without passing within three feet of your office wall, your layout creates a dangerous pinch point for pedestrians stepping out of the cabin door.
Sloped or unpaved ground introduces further complications that compound quickly during seasonal rains. Placing structures over soft, backfilled soil without adequate surface water management causes ground erosion beneath the support corners. If you notice pooling water after a short rainfall or find that your site layout leaves less than ten feet of clear access for emergency exits, you must redraw your boundary lines before mobilizing equipment.
Stage 2: Off-Site Structural Modification and Shell Fabrication
Fabricating steel containers as offices inside a factory saves considerable time compared to traditional site-built timber sheds. Factory fabrication cuts overall construction delivery schedules by 30 to 50 percent because metal fabrication, rough wiring, and interior lining proceed indoors while your civil works crew prepares the site footings outside. Building in a controlled environment also reduces raw material scrap by up to 90 percent compared to on-site building methods, making it an efficient way to assemble high-performance workspaces.
A shipping container relies entirely on its corrugated Corten steel side panels and corner posts to maintain its structural strength. The moment a fabricator cuts away steel wall panels to install commercial windows, personnel doors, or pass-through openings, the box loses its engineered stiffness. Factory modification requires restoring that structural capacity through engineered perimeter steel framing before the unit ever leaves the workshop floor.
Why Do Unreinforced Cutouts Cause Structural Weaknesses?
Cutting large openings for double-glazed windows or side-by-side modular combinations weakens the monocoque structure of the steel shell by removing the load-bearing corrugated panels. If a fabricator simply cuts out a nine-foot corrugated section and welds light-gauge hollow metal studs directly to the raw sheet edges, the container roof will sag under its own weight over time. You will feel that defect when you walk across the floor, or notice the top rail dipping toward the center of the window opening.
To prevent this, fabricators must weld structural steel box tubing or hot-rolled structural channel sections around the perimeter of every opening. These structural steel frames carry the roof load back out to the heavy corner castings, keeping the unit rigid when stacked or hoisted. We reject units built without engineered header beams across wide spans because they inevitably warp and bind the window sashes once the structure experiences real-world site movements.
How Can You Detect Thermal Bridging and Defective Insulation?
You can detect thermal bridging and defective insulation by checking for temperature striping across interior drywall, condensation buildup behind wallboards, or rapid interior heat swings. Steel carries heat rapidly, turning an uninsulated metal shell into an oven under direct sunlight and a cold box in winter. Defective thermal insulation also creates severe condensation cycles where moisture condenses behind interior gypsum wallboards, rotting the timber framing studs and feeding black mold growth out of sight. A conversion that uses cheap fiberglass batts pressed directly against corrugated steel walls without a proper thermal break will fail within two seasons.
Look for continuous polyurethane spray foam insulation or rigid polyisocyanurate panels installed with isolated furring channels. Spray foam bonds directly to the Corten steel skin, sealing off air gaps and preventing humid air from hitting the cold steel face. If you run your hand down an interior wall on a hot afternoon and feel cold and hot stripes across the drywall, the fabricator failed to isolate the metal studs from the outer shell, creating thermal bridges that waste air conditioning power.
Stage 3: Electrical, Plumbing, and HVAC System Integration
Fit-outs for office containers must balance heavy climate-control demands with the realities of unstable temporary worksite power. A regular office building draws power from an established city utility grid, whereas construction offices often rely on temporary distribution boards or diesel generators subject to voltage spikes and dirty power. Your mechanical and electrical systems must handle these wild swings without tripping breakers or burning out expensive compressor motors.
We prefer running commercial surface-mounted metal conduit or heavy-duty wire raceways inside cabins rather than hiding wiring entirely behind fixed wall linings. Surface raceways let your maintenance team trace circuits, add data drops, and balance electrical phases without tearing open finished interior panels whenever site requirements change. Every panel must feature proper circuit labeling, residual current devices, and dedicated isolated circuits for sensitive computers and network servers.
What Causes Under-Specified Climate Systems and Circuit Overloads?
Under-specified climate systems and circuit overloads happen when low-capacity residential cooling units fail to offset direct solar heat gain, or when high-draw appliances share a single utility branch. Using undersized through-wall residential air conditioners to cool a container office causes constant maintenance headaches. These low-end units lack the cooling capacity to counter direct solar gain across unshaded steel roofs, running flat-out until the compressor seizes. When four engineers power up desktop monitors, run laser printers, and turn on an electric kettle on the same twenty-amp utility circuit, the main breaker trips repeatedly and halts work across the cabin.
You should insist on high-efficiency, commercial-grade inverter split-system heat pumps rated for extreme ambient temperatures. Calculate cooling and heating loads using your local peak climate values, factoring in human occupancy, glass heat gain, and heat thrown off by office electronics. Distribute these loads across multiple dedicated branch circuits, giving your HVAC systems their own breakers so an overloaded convenience outlet never knocks out your climate control during a heatwave.
How Do You Identify Condensation Buildup and Faulty Drainage?
You identify condensation buildup and faulty drainage by inspecting internal partition walls for damp spots, checking for sluggish waste runoff caused by flat pipe slopes, and verifying air conditioner condensate discharge. Plumbing runs inside converted modular cabins require deliberate planning to prevent water damage and sewer gas leaks. Because containers sit low to the ground on temporary footings, you have very little vertical drop beneath the floor to build proper gravity-fed waste lines. If your contractor installs flat PVC pipe runs without the correct fall, sinks and toilets will drain sluggishly and back up foul water into your washroom floor trays.
Condensation drainage from your split-system air conditioning units requires just as much care as your blackwater waste pipes. If an installer routes the flexible condensate drain line straight into an unvented internal partition or leaves it terminating directly onto the external steel floor rail, water will rot the base of your wall. Ensure all condensate lines drain completely clear of the structure using rigid piping directed toward site drainage channels, and verify that every sink fixture includes an accessible P-trap with anti-siphon valves.
Stage 4: Jobsite Hauling, Access Planning, and Crane Rigging
Moving completed container offices from a production yard to your project location involves substantial logistical coordination. A forty-foot high-cube conversion weighs between eight and twelve thousand pounds depending on its interior architectural finishes, partition walls, and installed fixtures. Transporting these heavy loads requires flatbed trailers, wide-load route clearances, and heavy-capacity cranes capable of lifting the unit safely over site hoarding and perimeter walls.
A smooth delivery comes down to clear access routes and disciplined rigging operations on drop day. If you fail to walk the route from the main highway to your site gate beforehand, your transport truck can easily get stuck under low telephone lines or bottom out across rough transitions. We recommend following a structured sequence before the transport truck arrives at your gate to protect your investment and avoid expensive crane standby fees:
- Survey the access corridor: Walk the entire path from the public access road to the drop zone, checking for low tree branches, hanging power lines, parked vehicles, and narrow gate turning radiuses.
- Check soil bearing capacity: Verify that the outrigger deployment zone for your mobile crane can support heavy point loads without sinking into uncompacted backfill or crushing shallow utilities.
- Examine lifting gear certifications: Check that the spreader bars, wire rope slings, and safety shackles carry valid load test tags rated for the total gross weight of the converted cabin.
- Attach bottom-corner twistlocks: Rig the crane lifting slings directly into the bottom corner castings using purpose-built container lifting lugs, rather than hooking straps around body panels.
- Control the swing with tag lines: Tie two heavy nylon guide lines to opposite ends of the container frame so your ground crew can steady and guide the suspended load safely without standing underneath it.
What Are the Access Route Chokepoints That Stall Delivery?
Delivery trucks stall primarily at tight turning gates, under low-hanging overhead utility lines, and beneath temporary scaffolding tunnels that cannot clear standard flatbed hauling heights. High-cube containers loaded onto standard flatbed trailers often reach total transport heights of thirteen feet and six inches, leaving very little clearance under overhead bridge crossings and temporary scaffolding tunnels. If the driver hits a low obstruction or gets stuck on a sharp curb, you face severe traffic fines and hours of crane downtime charges.
You can prevent these transport snarls by running a dedicated transport survey two weeks before dispatch. Measure the entry gate width carefully to ensure a sixty-foot articulated vehicle can swing inward without jackknifing. If your site has tight corners, book an agile rear-steer trailer or arrange an early Sunday morning delivery window when local street traffic drops, giving the haulage team enough room to maneuver cleanly.
How Do You Spot Transit Frame Twisting and Rigging Stress?
You can spot transit frame twisting and rigging stress by looking for flexing along bottom side rails, cracked interior drywall, or binding window sashes during crane lifting. Rigging a converted office incorrectly puts severe torsional twist through the steel frame, cracking interior drywall, breaking glass window seals, and popping ceiling tiles out of their tracks. Using a short crane chain directly connected to the top corner castings pulls the walls inward with enormous lateral force. That inward crushing pressure warps the roof structure and pinches door frames out of square before the unit ever touches your foundation.
Always demand a certified spreader bar that matches the exact width of the container, ensuring all four lifting wire slings pull vertically from the corner castings. When the crane lifts the cabin clear of the trailer bed, step back and look along the bottom structural side rails. If you see the lower frame flexing or twisting out of plane, signal the crane operator to set the load back down immediately so you can rebalance the rigging weight.
Stage 5: Final Foundation Positioning and Utility Commissioning
The final installation stage for a containers office dictates how reliably the workspace will perform for the rest of your project timeline. A converted steel unit does not distribute its weight evenly across its entire base; almost all structural load passes directly through the four corner castings. Setting those castings on unstable wooden blocks or uncompacted dirt invites severe settlement problems as soon as heavy rains soften the ground beneath the pads.
We prefer pouring precast concrete footings or setting heavy-duty steel baseplates bedded on compacted crushed aggregate at each corner point. For long multi-unit modular assemblies, you must verify that every footing elevation matches within a strict tolerance of three millimeters. Taking the time to build a solid, level base keeps the structure stable, preserves structural integrity, and ensures that utility pipe connections stay watertight throughout the project lifecycle.
What Causes Differential Foundation Settling and Door Misalignment?
Differential settlement occurs when uneven soil compaction or inadequate footing pads allow one corner casting to sink faster than the others, twisting the rectangular frame and jamming personnel doors. The first sign of this structural racking shows up at the personnel doors. An exterior steel door that swung smoothly during factory inspection will suddenly start rubbing hard against the top jamb, bind against the strike plate, or refuse to latch shut altogether.
Staff often try to fix this issue by grinding down the door latch or shaving the door edge, but doing so treats the symptom while ignoring the structural movement beneath. If an office door begins sticking, set a precision spirit level across the corner posts and along the side rails to find which support point has dropped. You must jack the low corner back up using a hydraulic bottle jack and insert steel shims beneath the corner casting to bring the frame back into level.
How Do You Verify Leveling Stability and Ground Utility Hookups?
Verifying leveling stability and utility hookups requires testing structural alignment with precision spirit levels, confirming electrical frame grounding, pressure-testing fresh water pipes, and ensuring positive sewer fall. Rushing through utility commissioning without systematic testing leads to breaker trips, plumbing leaks, and hazardous grounding faults that put site personnel at risk. Systematic verification protects your team and confirms that all systems meet safety standards before workers move in.
Follow a strict commissioning process before handing keys over to the administrative team:
- Check frame earthing: Drive dedicated copper earth rods into native ground and bond them directly to the container steel chassis using heavy grounding wire to protect against electrical faults.
- Pressure-test water lines: Pump your fresh water supply lines up to working pressure and hold them for one hour to confirm there are no leaks at factory-to-field connection joints.
- Inspect drain venting: Ensure blackwater and greywater discharge pipes maintain a steady downhill drop of at least one-quarter inch per foot to the site sewer main without belly traps.
- Confirm voltage stability: Measure voltage under full operating load with all air conditioners and lights running to confirm line drop stays within acceptable operational limits.
- Seal perimeter base skirts: Install heavy timber or sheet metal base skirting around the open crawlspace under the unit to block wind-driven rain, stop thermal heat buildup, and keep pests out.
Getting your site accommodations right requires balancing project duration, available ground clearance, and factory fabrication quality. If you are planning an upcoming project and want to review modular layouts, structural steel reinforcements, or turnkey utility packages tailored to your site limits, talk with our engineering team to design a setup built to last your full project lifecycle.
Looking for Office Containers in Singapore?
Explore fitted office container solutions for construction sites, project teams and temporary workspaces. Speak with us about layouts and configurations.
Explore Office Containers